


The following describes how to create a new Java application with automatically inserted class templates (also see Application).
Create a new empty project
| |
Click on the File menu and select New in the iLCD Manager XE to open the configuration wizard. |
| |
There are several ways to select a panel in the next step. When an iLCD panel is connected to the computer the Auto-Set button can be pressed to select the panel currently in use. In case there is no panel available select an iLCD panel or iLCD controller. |
| |
Furthermore, the iLCD Manager XE provides a simulator. Thus a Java project can be implemented without hardware. The Simulator is available on the "Device" ribbon. Simply click the Run button. You can also add this button to the Quick Access Toolbar in the upper left corner of the iLCD Manager XE. |
|
|
The Create New button can be clicked after the desired panel is selected. |
Add Java class files to the empty project
 |
To add a basic Java application to the iLCD project select New on the "Java" ribbon. Follow the dialogs to create two basic template classes, a Main Class and an Application Class. The files can be located anywhere, it's however recommended to keep all files in the same root folder. |
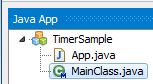 |
Both java classes will be added to the newly created Java App. Notice that the Main Class has a special icon. It contains
the main entry point of the Java application:
public static void main(String[] args) There can only be one Main Class in an iLCD Java application. The Java application can already be build but want do anything interesting yet. |
Add the following code to write simple text messages to the console every second.
Add code to the App class:
Put the following code in the application class, e.g. App.
private int countOnUpdateMethodCall;
Put the following code into the constructor App().
try
{
countOnUpdateMethodCall = 0;
Console.println(" " + countOnUpdateMethodCall +
". onUpdate() call \r");
}
catch(Exception exc)
{
Logger.e(exc.getMessage());
}
Put the following code into the onUpdate() method.
// count each call to the onUpdate() method
countOnUpdateMethodCall++;
try
{
// draw the count of the onUpdate() calls to the screen
Console.println(" " + countOnUpdateMethodCall +
". onUpdate() call \r");
}
catch(Exception exc)
{
Logger.e(exc.getMessage());
}
// wait a second
try
{
Thread.sleep(1000);
}
catch(InterruptedException ie)
{
Logger.e(ie.getMessage());
}
After coding is done
 |
Click the Run button. This will start the debugger. Notice that everything will be automatically downloaded to the iLCD panel. Feel free to add breakpoints to the OnUpdate() method. Now, every second a message is written to the screen. See How To Create A Java Application With Touch Handling on how to handle touch events. |
Copyright © demmel products gmbh. All rights reserved.