Real-time Co-Processor#
This guide shows how to setup a toolchain for the development of real-time applications for the ARM Cortex M7 microcontroller on the i.MX8M-Plus SOM. The goal is to load and debug a “hello_world.c” application into the ARM Cortex M7 MCU, which will send “hello world.” via UART.
The following hardware is required to follow the guide:
Computer running VSCode
Serial to USB Converter (to read out “hello world”)
Install Build Environment#
NXP provides a coding environment for the ARM Cortex M7 known as MCUXpresso. We recommend using it as a plugin for VSCode. This is easy to setup and convenient for people already used to the VSCode interface.
Click the Extensions icon in VSCode’s activity bar and search for “MCUXpresso for VSCode”.
Install the plugin
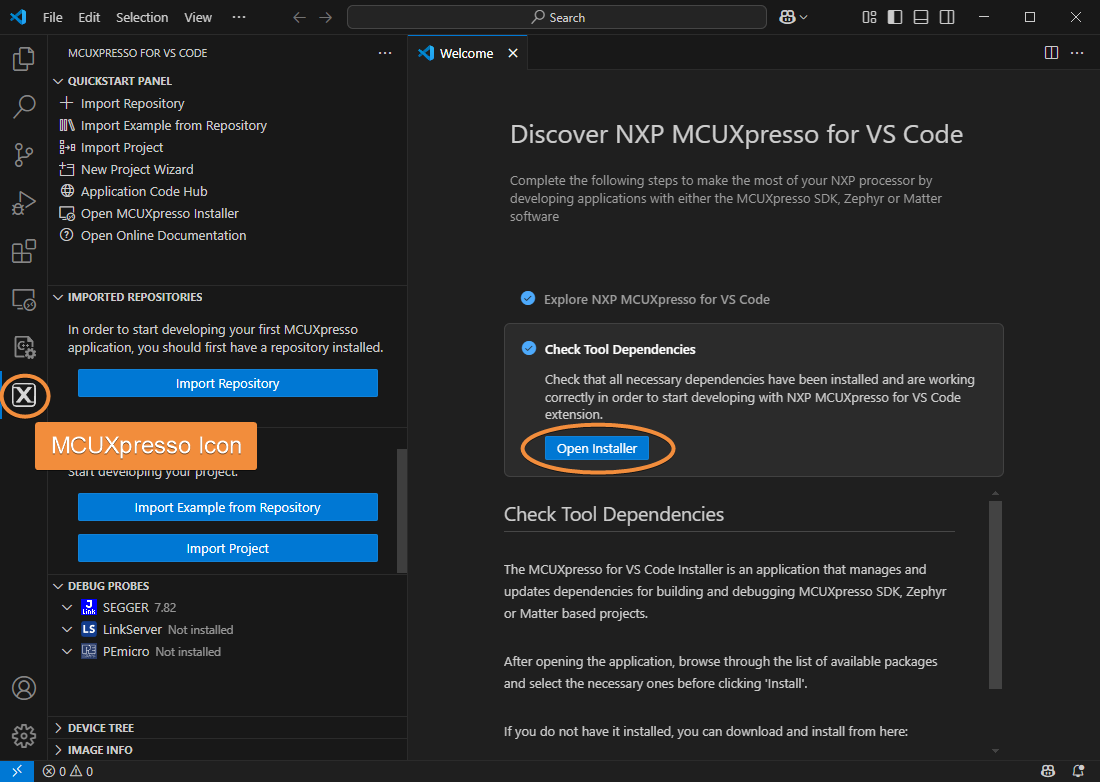
Click the newly created MCUXpresso icon in the activity bar
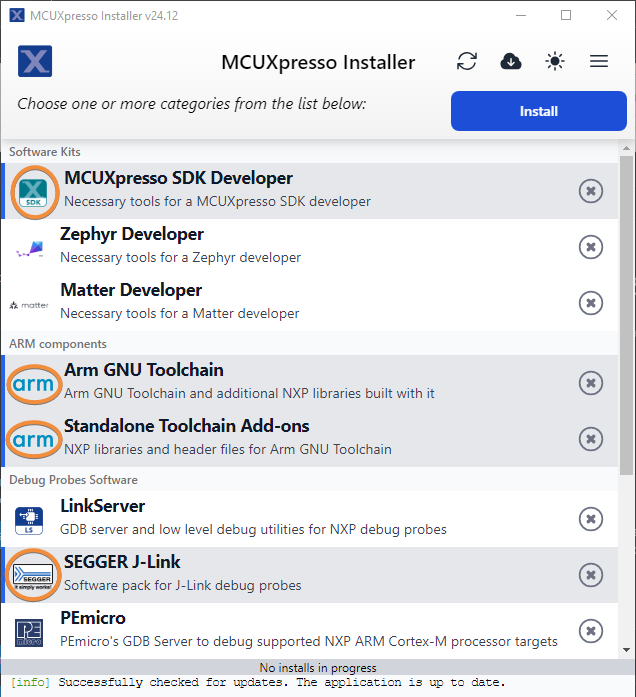
In the “Quickstart Panel” click “Open MCUXpresso Installer” and follow the instructions.

Select the following packages to install:
Package |
Install? |
|---|---|
MCUXpresso SDK Developer |
yes |
Zephyr Developer |
no |
Matter Developer |
no |
ARM GNU Toolchain |
yes |
LinkServer |
yes |
others… |
no |
The installation may take a few minutes, so at this point feel free to get yourself a refreshment. When the installation finishes you will be prompted to restart VSCode so that the PATH variables can be detected.
Note
In our runthrough we had to restart the PC for this to work. Try this first in case of undetected PATH variables.
Check Tool Dependencies#
The MCUXpresso Installer features a convenient tool which checks dependencies and installs needed packages. Click “Open Installer” and follow the steps provided.
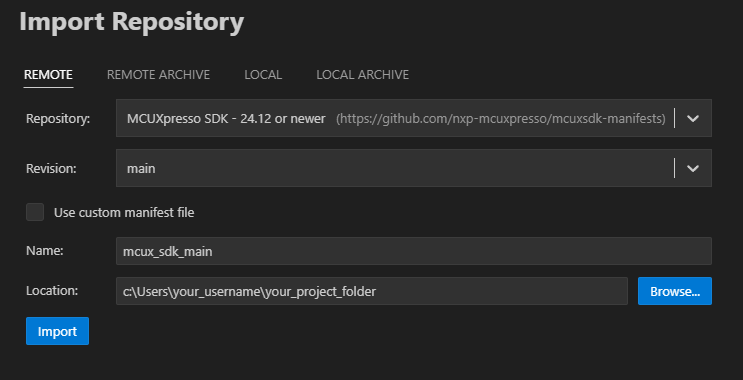
Import Repository#
Click “Import Repository” from the “Quickstart Panel”. Insert the following parameters:
Item |
Input |
|---|---|
Repository |
MCUXpresso - 24.12 or newer |
Revision |
main |
Name |
mcux_sdk_main |
Location |
Wherever you want, keep in mind that the example files will be stored there as well |
Click “Import”. The process may take a few minutes, so it’s time for your second refreshment.
Deploy hello_world.c#
Now that our build environment is all set up, it’s time to start using it. For the purposes of this guide we’ve decided to deploy a simple “hello_world.c” program, but you are of course free to chose for yourself.
Import Example from Repository#
Next click “Import Example from Repository” in the MCUxpresso dashboard. In the window that opens enter the following parameters:
Item |
Input |
|---|---|
Repository |
c:\Users\your_username…\mcux_sdk_main |
Toolchain |
(Arm GNU Toolchain 13.2.rel1 (Build arm-13.7) 13.2.1 20231009 |
Board |
EVK-MIMX8MP |
Template |
demo_apps/hello_world |
App type |
Repository application |
Finally click “Import”
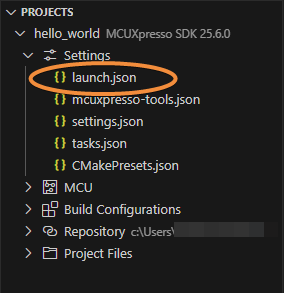
Update Launch Settings#
Next in the project folder structure select the file launch.json
In the file enter the parameters as shown in the codeblock under "segger":
    "gdbServerConfigs":
    {
        "linkserver": {},
    	"segger":
        {
            "interface": "JTAG",
            "speed": "1000",
            "device": "MIMX8ML8_M7",
        },
    	"pemicro": {}
    },
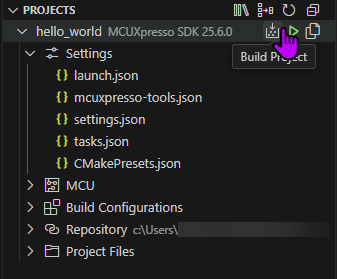
Build Project#
The Build Project and Debug commands may be hard to find. The following screenshot shows the respective buttons in the example project folder structure.
Attach Hardware#
Attach the 24-Pin Expansion PCB to the I/O Connector using a top-to-bottom FFC cable.
Attach the Serial-to-USB converter to your PC.
Attach the wires of the Serial-to-USB to the 24-Pin Expansion PCB in the following way:

Cable |
Color |
Pin |
|---|---|---|
TXD |
Green |
9 |
RXD |
White |
10 |
GND |
Black |
24 |
Attach SEGGER Debugger to JTAG Port.
Any panels of the iLCD Linux Bonded Solution require a Debug Board to be mounted first. This board provides the JTAG interface needed by the SEGGER debugger.
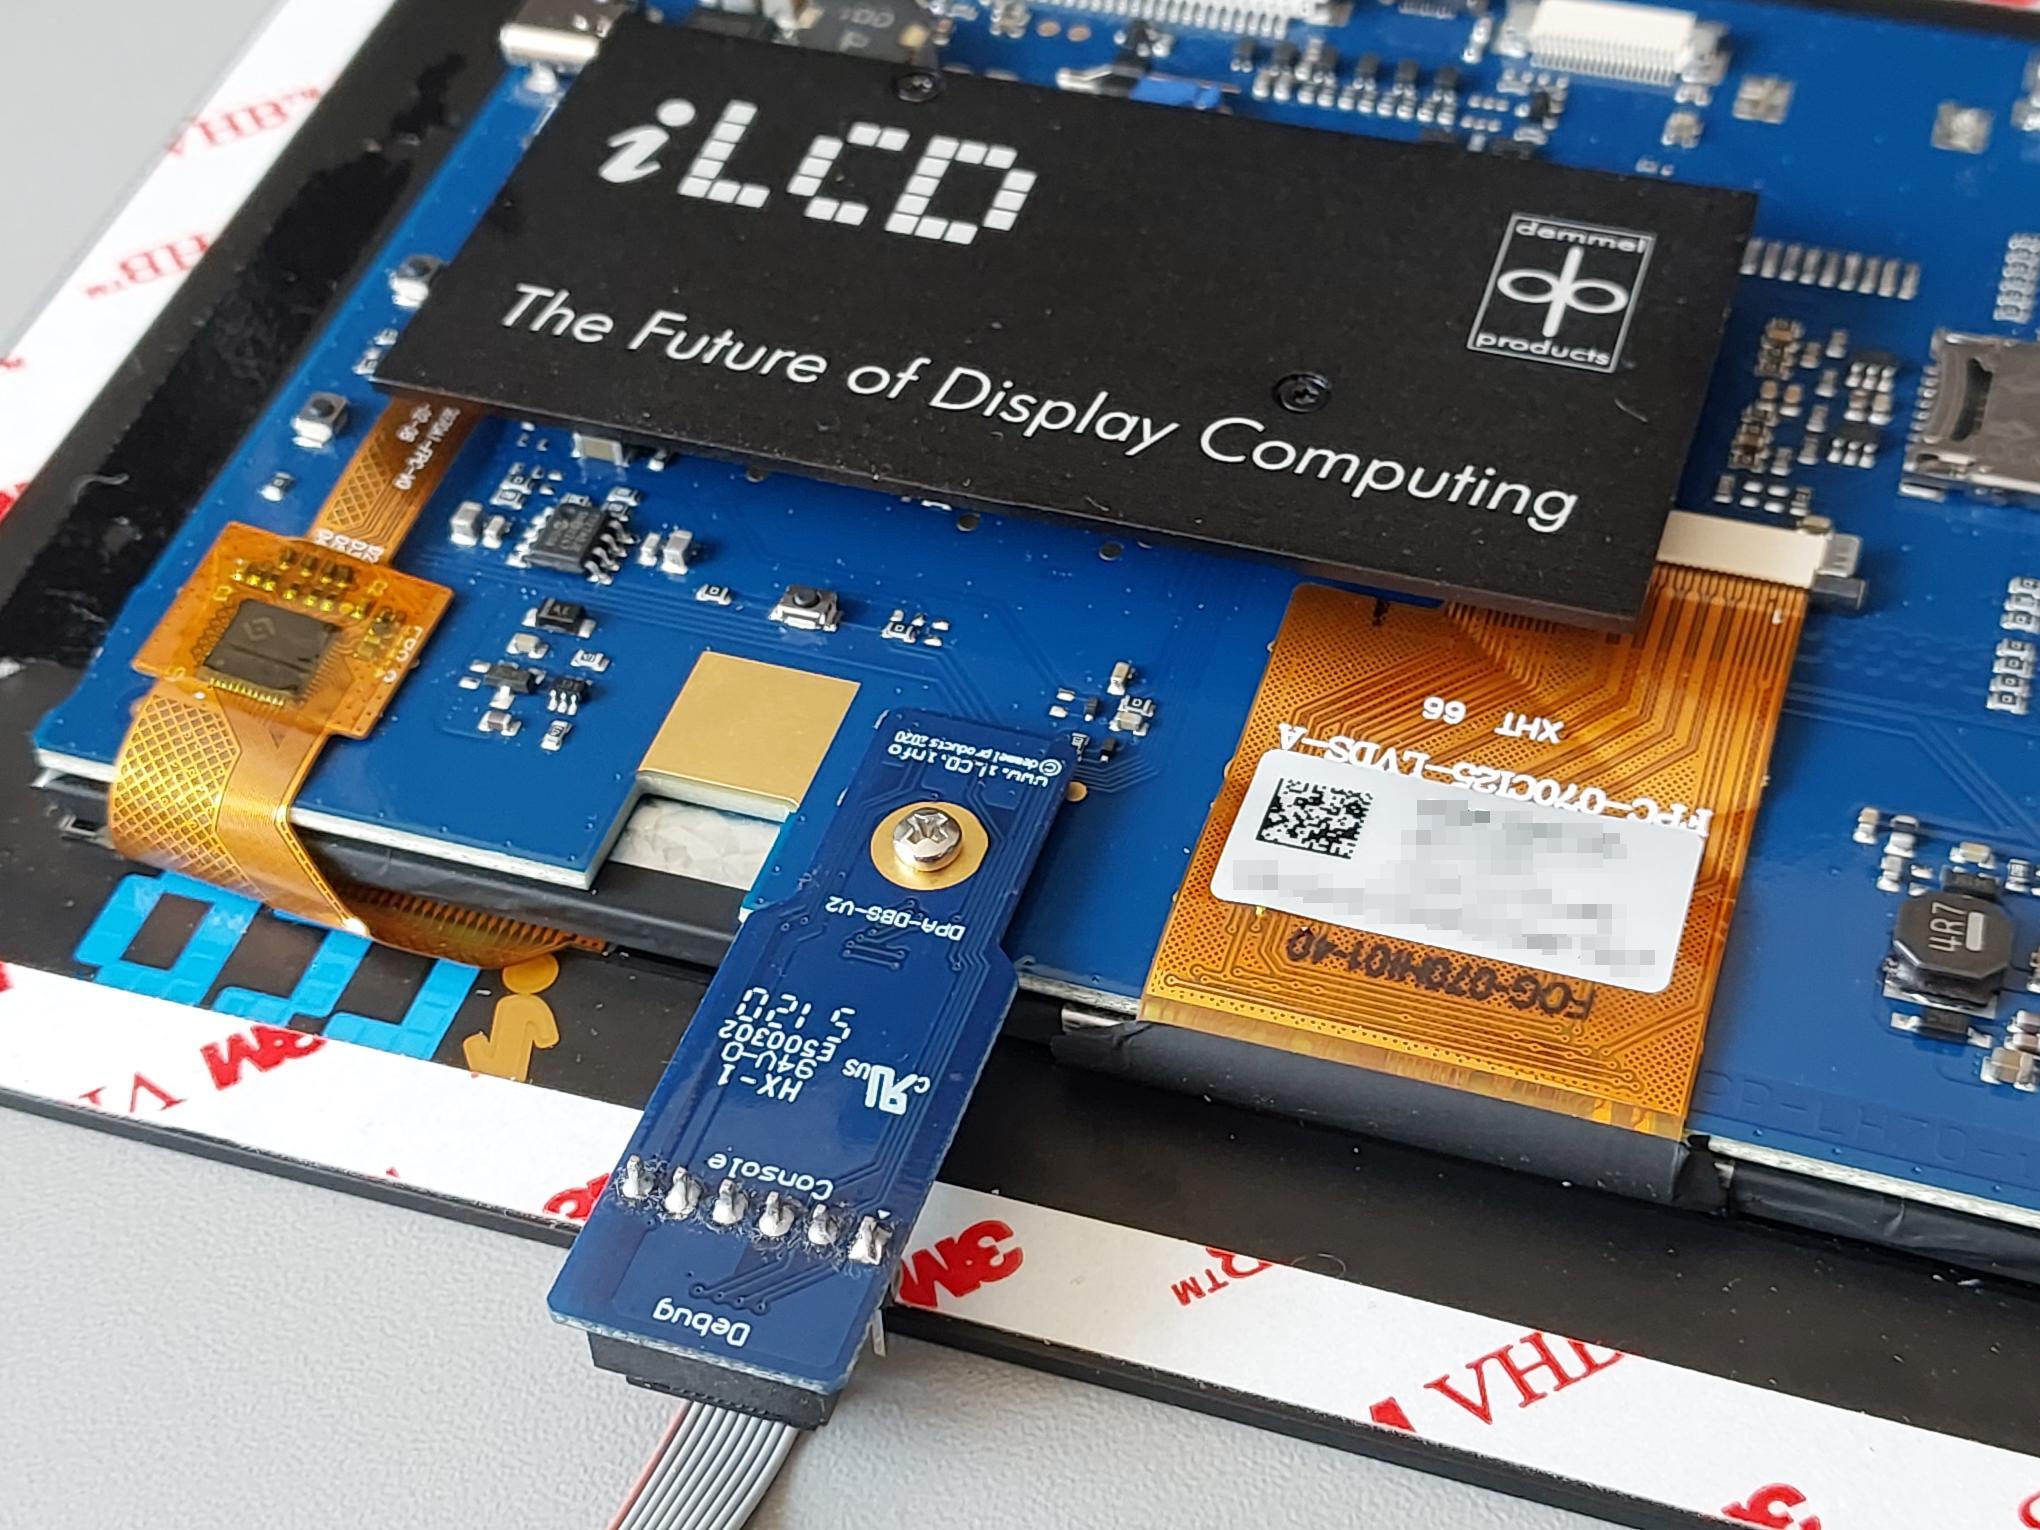

The iLCD Linux Mainboard has a suitable JTAG port mounted directly on the PCB
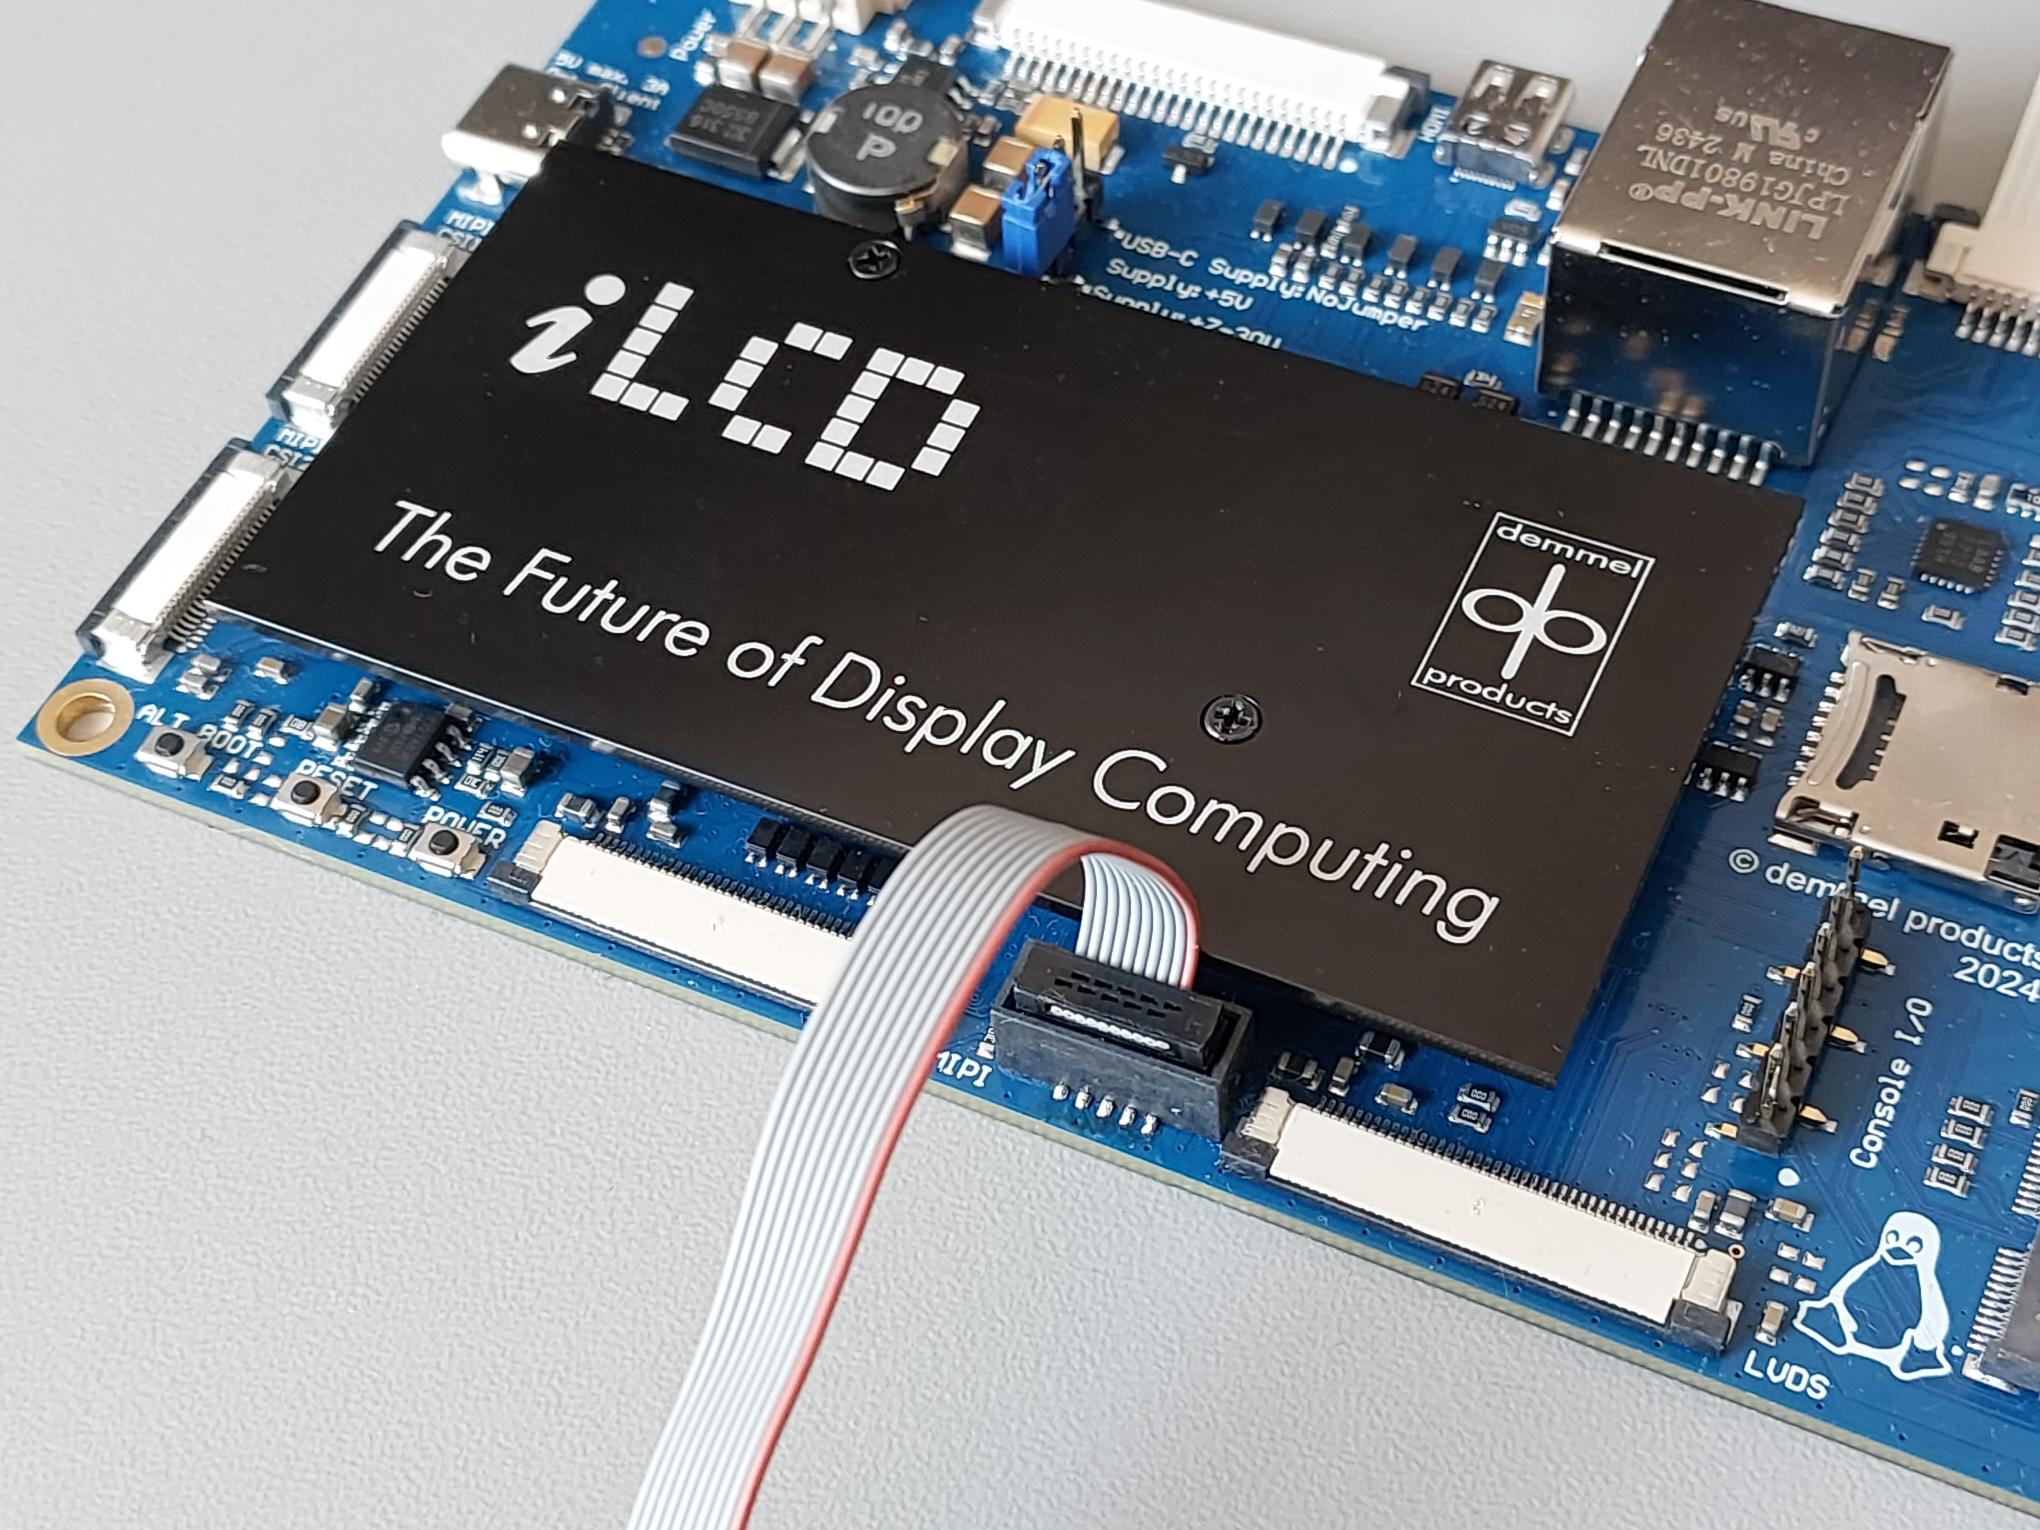
Attach the power supply according to the Power Connector Settings.
Run and Debug#
Run the Debug command. This will deploy the example to the ARM Cortex M7 and provides the MCUxpresso debug tools.

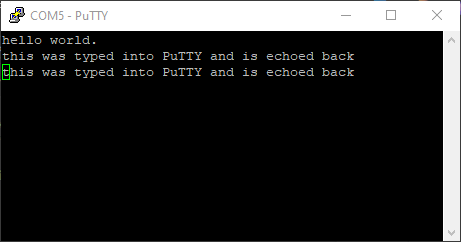
(Optional) Check UART Output#
Check your Device Manager to determine which USB port is being used by the Serial-to-USB Converter. Then listen on that port using your serial console of choice, such as PuTTY. You should be able to read out hello world. and read back what you type into the console. This confirms the functionality of your setup.